Thursday, April 21, 2011

Hawaiian Punch Cupcakes

(Hawaiian Punch Cupcakes)

Things you'll need:

1 box of white (not vanilla) cake mix
1 can of vanilla frosting
3 eggs
1/3 cup vegetable oil
1 1/4 cups Hawaiian Punch
pink food coloring (to dye frosting)

Directions: 

  1. Preheat oven to 350. Line cupcake tin with paper liners or, if you are not using them, grease each of the cups in the tin. Set aside.
  2. In a large bowl, mix together cake mix, eggs, oil and Hawaiian Punch. 
  3. Divide batter among the cups in the cupcake tin and bake for 22 minutes, or until a toothpick inserted into the very middle cupcake comes out clean.
  4. Dye the frosting the shade of pink you think works best for you and, once cool (it'll take at least 14 minutes for them to), frost.
Makes: 36 regular sized cupcakes

Friday, April 15, 2011

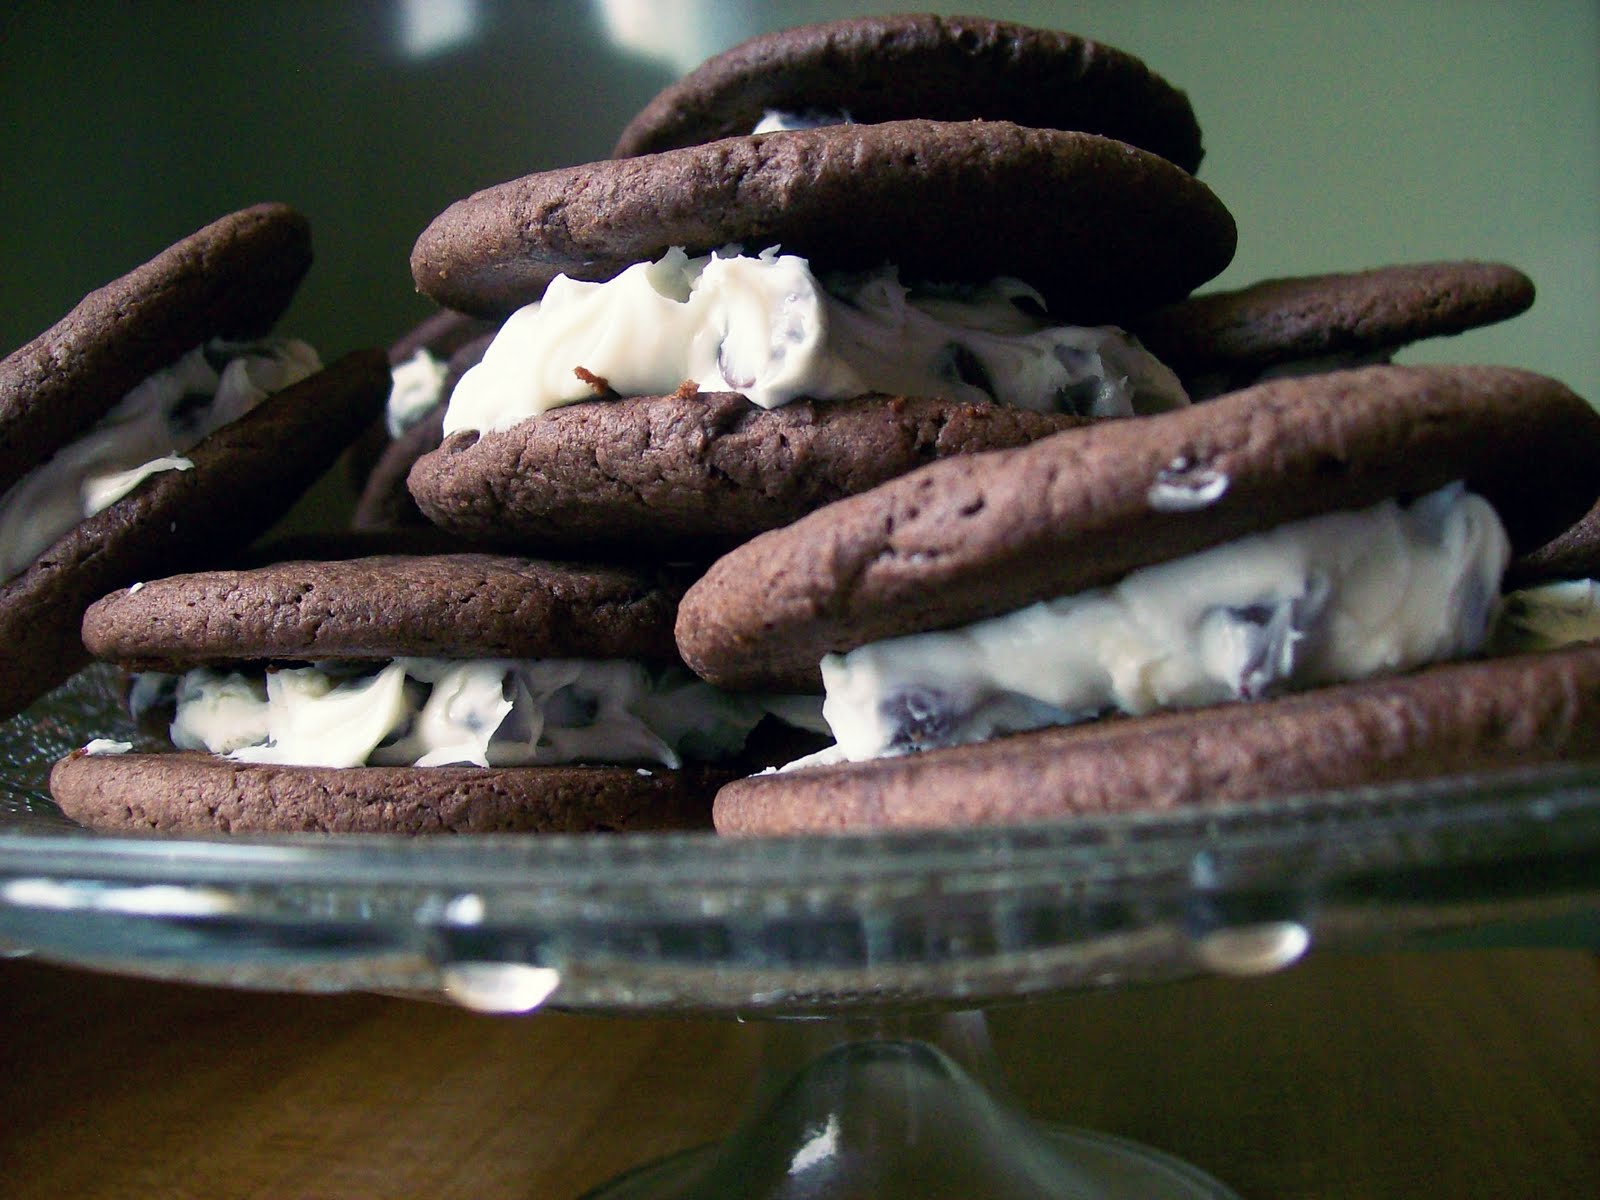
Chocolate Whoopie Pies with Vanilla Chocolate Chip Filling

This is the first of many, many entries to come and it's so incredibly easy! It took me less than an hour to make them all. Believe it or not, it doesn't require many ingredients either so...let's get started.

What you'll need for the cookies:

1 box of chocolate cake mix (your choice)
2 eggs
1/2 cup of vegetable oil

What you'll need for the filling:

1 can of vanilla frosting
half a bag of chocolate chips (your choice of brand)


Directions:

1). Preheat your oven to 350 degrees. In a large bowl, combine your cake mix, eggs and vegetable oil. The dough will be quite thick so, even if you are tempted to "thin it out a bit" with water, don't. This is what it should look like when it's done:


2). Measure out rounded spoonfuls of the dough and place them on a cookie sheet, 9 to a sheet.


3). Using either the palm of your hand or the bottom of a glass, press the dough balls flat.


4). Bake for 11 minutes and remove them to a wire rack to cool. It won't take them only to cool at all, just about 4 or 5 minutes. Once they are, you can pile them up on a plate.


5). When all the cookies are done, you can go ahead and start your filling. Just empty a container of vanilla frosting into a medium bowl and fold in half a bag of chocolate chips.


6). Once all the cookies are cool, sandwich the filling between two cookies and pile them up in a large bowl or cake stand to serve them.


Enjoy!

Saturday, April 9, 2011

Pretty Girl Rice Krispie Treats

(Pretty Girl Rice Krispie Treats)

Sometimes, having regular rice treats is nice. Adding in something like chocolate chips, peanut butter, caramel or anything else seems like too much of a hassle and, let's face it, sometimes you just want to have plain ol' treats!
That doesn't mean that those treats have to be plain looking, though. Jazz them up with some sprinkles!

The recipe is very simple, as it should be. You'll need:

1 box of puffed rice cereal
1 large bag of marshmallows
1 stick of butter
1 jar of the sprinkles of your choice
A greased cake pan, in whatever size you choose

Directions:

  •  Melt the stick of butter in a large/oversized pot. Once it's melted down completely, add in the marshmallows. Stir them occasionally to make sure they melt as well. The process could take a short while, about 7 or 8 minutes. 
  • Once the marshmallows have melted, remove the pot from heat.
  • Pour cereal into the marshmallow mixture along with the ENTIRE jar of sprinkles. Fold everything together with a wooden spoon until very well incorporated.
  • Spoon the mixture out into the cake pan you have greased and allow to set and cool for about an hour.
Enjoy!

Friday, April 1, 2011

Macarons Made Easy(ish)


("Macarons" by Berengere Abraham)


Yesterday, the post brought in the first cookbook I have ever purchased for myself. This lovely jewel has such great ideas for macarons that I cannot wait for it to be October again in order to really enjoy them. While, of course they can be enjoyed year round, I prefer them as autumn approaches.

What I don't love so much? The very complicated recipes for them that you will find all over the internet and, sometimes, in books.

Macarons have long since had a history of being difficult, at best, to make. I don't find this to be true. However, I do believe they require a great deal of patience and a touch of creativity. They aren't something a novice would probably enjoy making but, if you fancy yourself a pro, or just enjoy a challenge, then they are perfect for you.

Here is my own step-by-step guide to fool-proof French macarons.


The basic recipe:

1/4 cup of finely ground almonds*
1 1/4 cups powdered sugar
3 egg whites
pinch of salt
1/4 cup sugar
Filling of your choice
Pastry bag or a large Zip-Lock bag
large round tip
parchment paper
an old oven mit

*If you are allergic to almonds, or simply do not like the taste, using them is not essential. However, realize, you will no longer be making "French macarons" but, instead, meringue shells.


Directions:


  1. In medium sized bowl, with an electric mixer attached with a whisk, beat egg whites and pinch of salt on medium speed, until foamy. Slowly add in the sugar and crank the speed up to high. Continue to beat mixture until white, glossy peaks form in the bowl. This could take a while. If you're using a hand mixer, don't get discouraged easily. 
  2. Preheat oven to 350 degrees.
  3. Fold powdered sugar into the egg mixture.
  4. Line a cookie sheet with parchment paper. Set aside.
  5. Fit the pastry bag or Zip-Lock bag with a large round tip. Spoon meringue mixture into the bag. Pipe small rounds onto the parchment paper and place remaining mixture into the fridge. Allow the meringues to "dry" for at least 20 minutes. The longer it can "dry", the better.
  6. Once you have allowed the meringues to "dry" (you should be able to touch them without leaving a fingerprint), put them into the oven. Be VERY careful not the shut the door all the way. Keep it ajar using an old oven mitt, preventing it from closing all the way. Allow to bake for about 12-15 minutes. You'll know they're done when the tops of them look glossy and dry.
  7. Remove them from the oven and allow them to cool. They cool quite fast so, about 5 minutes is all you really need. Very carefully peel them from the parchment paper and place them, flat side down, on a plate until you're ready to assemble them, sandwiching your favorite filling (be it a ganache, frosting or jam) between two of the meringues.
Flavoring the mixture is extremely easy, too! Make the macarons according to the above directions and, after you fold the powdered sugar into the egg mixture, add your favorite exact or about a teaspoon of your favorite spice or dry ingredient. Coloring them with food dyes can also be done in this step.

Enjoy!

 (All photography belongs to me!)

Sunday, March 20, 2011

Upcoming Posts!


(photo: 'Watermelon' Cake)
It's the first day of Spring! So, it's official: I am starting back to "work" full-time this week. It's going to be pretty hectic in the mornings but my afternoons and weekends are going to be filled with as much baking as I possibly can come up with.

When I started this blog, I said I would always try to keep everything I make simple so, that is what I am going to try to adhere to over the course of the spring and summer. In fact, I sat down and wrote out a list of the awesomely fantastic things I am going to be making soon. Here is the master list:

  • Chocolate Whoopie Pies with Vanilla Chocolate Chip Frosting
  • Hawaiian Punch Cupcakes
  • Decadent Brownie Pizza
  • Apple Pie Pound Cake
  • Neapolitan Pudding Sundaes
  • Strawberry Lemonade Cupcakes
  • M&M Parfaits
  • Homemade Ice Cream Sandwiches
  • Sweetheart (PINK!) Pancakes
  • Sweet Won-Tons 
  • Chocolate Peanut Butter Ice Cream Cake
  • Two Color Sugar Cookie Ice Cream Sandwiches
  • Cinnamon Cheerio Breakfast Parfaits
  • Cake Batter Milkshakes
  • Lemon Cookies
  • No-Bake Mango Papaya Cheesecake
  • Peanut Butter Pancakes
I am always open to new ideas so feel free to make some suggestions as to what I can add to the list of goodies!

See you all soon.

xoxo,
Courtney

Monday, March 14, 2011

CoverGirl!


Haven't joined in yet? Well, let me tell 'ya, you're missing out.

CoverGirl is having an extremely awesome campaign going on full of prizes, beauty tips and all sorts of other fun stuff. I'm just spreading the word. It's free to join in on and such an amazing thing for them to do. Go try it for yourself!

Monday, March 7, 2011

Single Serve Cupcakes

The title might sound a bit redundant but, the reality is, almost everyone I know has a very difficult time eating just one cupcake. They are small and delicious and you want them to be everywhere you go. (Okay, maybe that is just me.)

I decided that I was going to put together cupcakes that I could take with me and that I could, potentially, send to some lovely people.

That's when I came up with the idea to put single cupcakes into small yogurt cups with lids. You know you probably have them around anyway.

Just bake your favorite cupcakes, without a liner, and pop them into an empty container. Yay for recycling! It's especially great if you have kids and want to tuck a little something extra into their lunchbox without having to worry about frosting getting everywhere.


Enjoy!